Managing Program, News, and Events Metadata

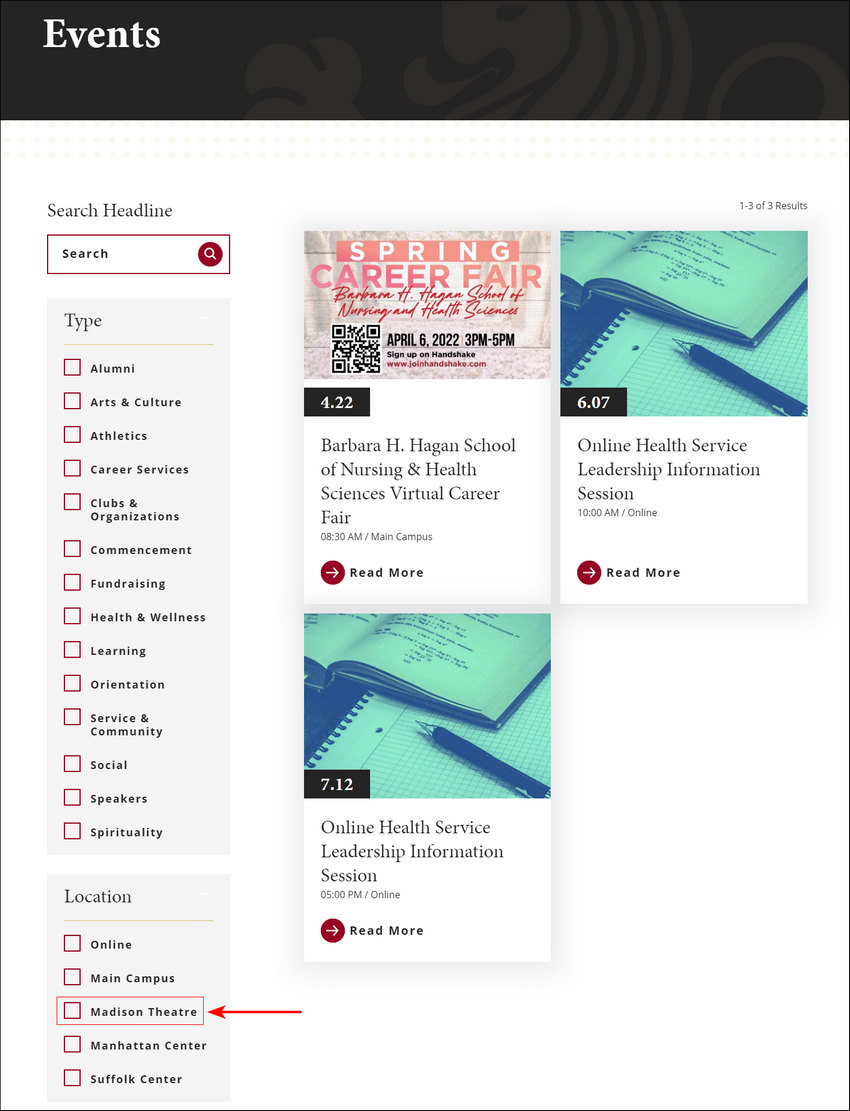
Metadata is used to provide the sets of check box selections (Degrees & Programs, Locations, etc.) in the Aggregate Details content on the following page types:
- Program
- News
- Event
Below is an example of the metadata for the Program page type.
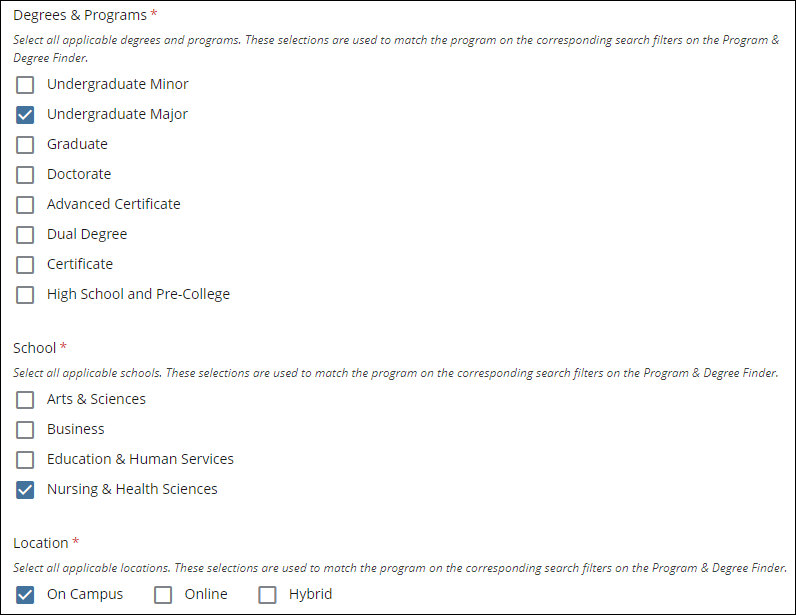
This metadata is paired with the filters on the aggregate pages to enable searching and filtering of the programs, events, and news.
Each page type (program, news, and event) has its own set of metadata.
Where the metadata is stored in the CMS and how to access it
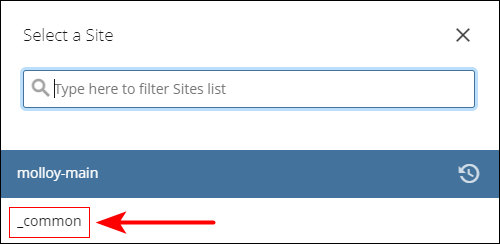
The metadata is stored in the _common site. To access this site in the CMS, click on the Site menu at the top left of the screen and then select the _common site from the sites menu.
After accessing the site, click the Manage Site link in the CMS menu bar at the top of the screen.

In the Manage Site menu, click on the Shared Fields option.
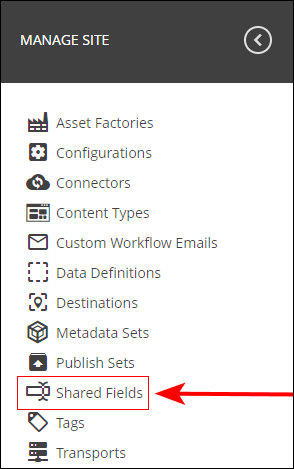
This opens the list of shared fields. The metadata is in the Metadata folder.
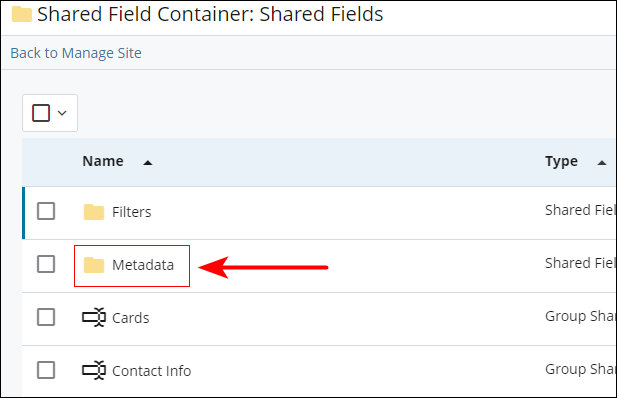
Within the Metadata folder, there are separate folders for the metadata for each page type.
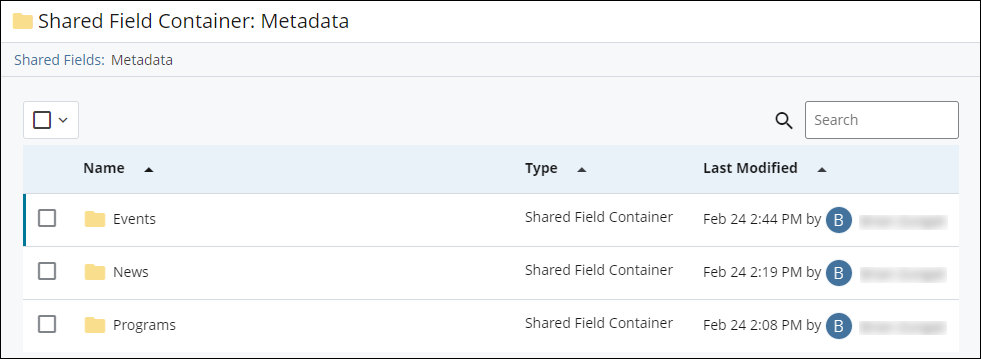
Within the folders are the individual metadata sets for each page type. Each set includes a specific type of metadata, such as program types or locations. Below is a screenshot showing the metadata sets for the Program page type.
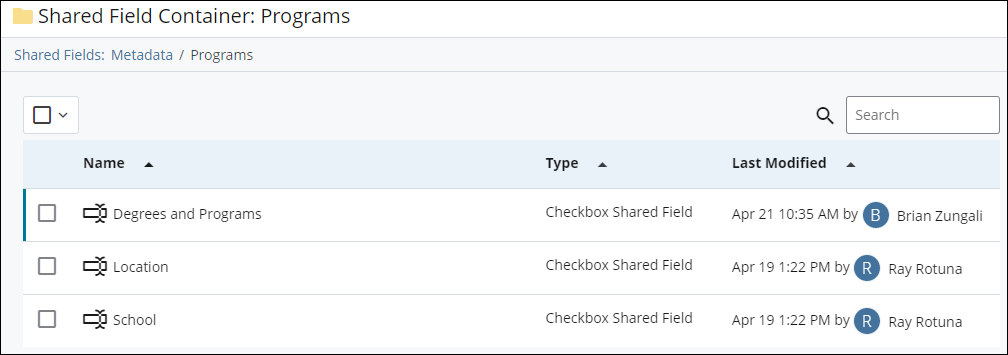
How to add an item to the metadata
Follow this procedure to add a metadata item to a metadata set for a page type. In this example, a new item is added to the Location metadata set for the Event page type. However, the procedure outlined here would apply to any metadata set used for Programs, News, and Events.
Note that this procedure begins after you have accessed the _common site and accessed the folders for the shared metadata fields.
Step 1: After opening the page type folder to list the metadata sets for the page type, click on the metadata set to edit.
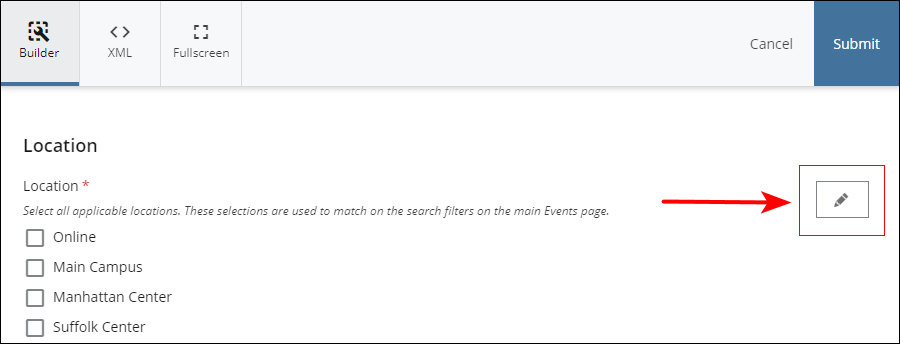
Step 2: The existing metadata items are listed.
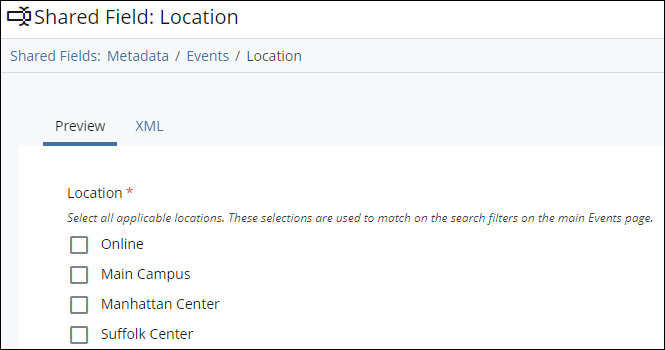
Click the Edit icon (pencil) to the right of the list to open the metadata set for editing.
Step 3: The list of items in the metadata set loads in a panel.
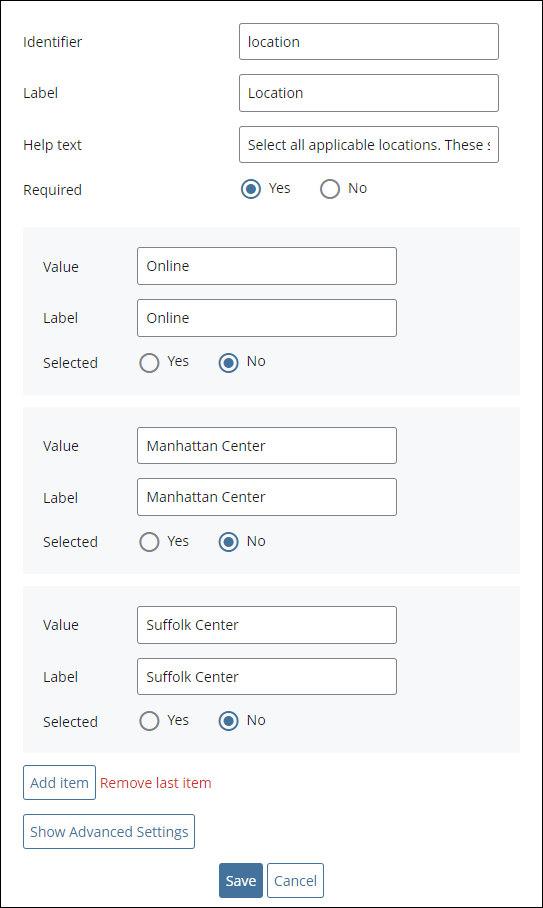
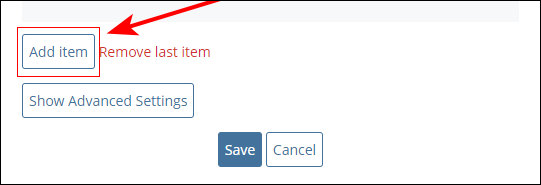
Scroll to the bottom of the panel and click the Add Item button.
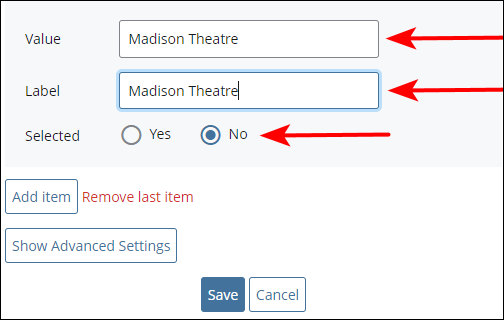
Step 4: A set of fields for the new metadata item is added below the last item in the list. In this example, a metadata item for the Madison Theatre is being added. This is entered into the Value and Label fields. Both fields should have the same content.
Keep the Selected field set to No unless you want the item to be pre-selected on pages that use it. In this example, if the Selected field is set to Yes, then all event pages would have the check box for this item pre-checked.
Step 5: Click the Save button below the new metadata item. This closes the editing panel.

The new metadata item is visible in the list.
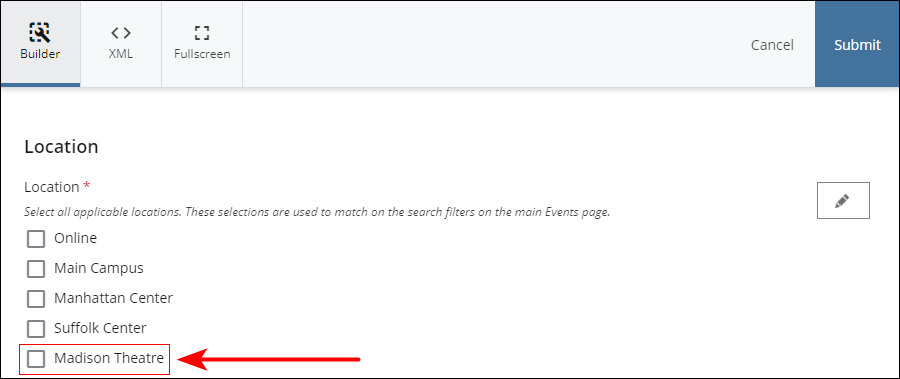
Step 6: Click the Submit button at the top right of the editing panel.
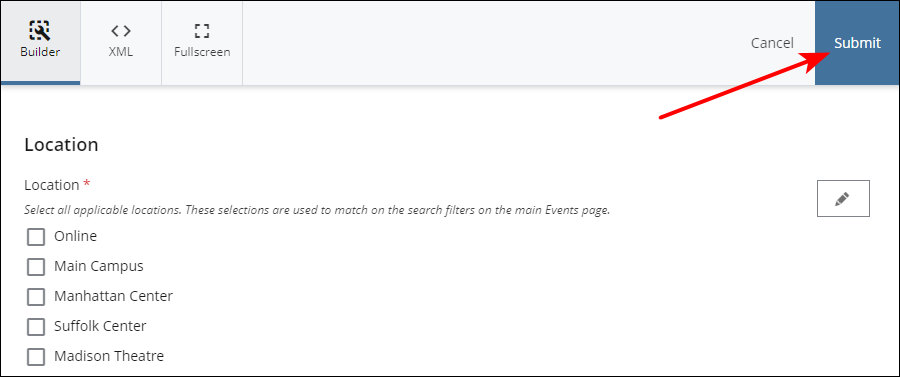
The new metadata item is immediately available in the Aggregate Details fields on all existing and new pages using the content type that uses the metadata. In this example, the Madison Theatre is now an option under Location in the Aggregate Details fields on event pages.
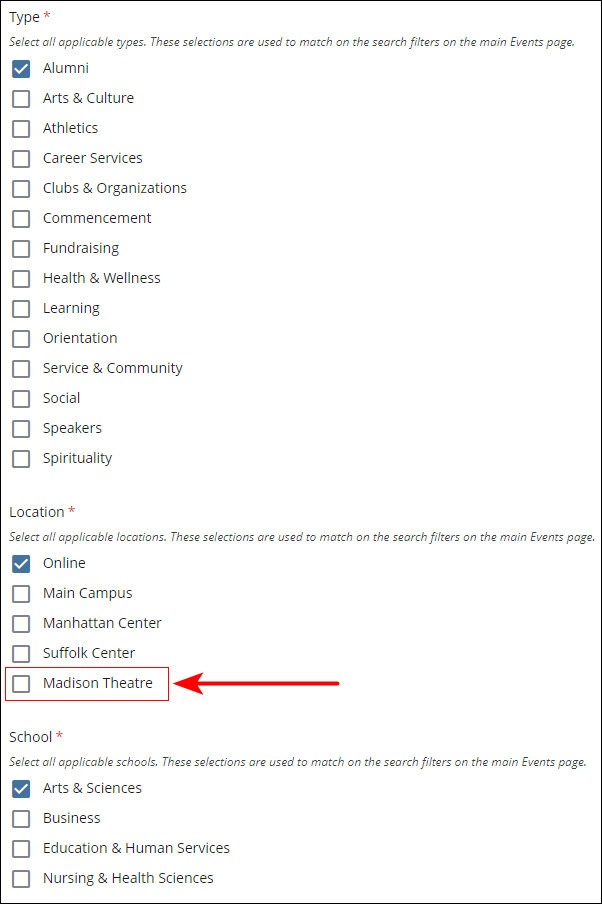
How to update the filters on an aggregate page to include the new metadata item
While new metadata items are visible in the Aggregate Details fields immediately after being added, they must be added manually as filtering options to the aggregate pages. The below procedure steps through the process of adding the new metadata item as a filter.
Step 1: Locate the corresponding aggregate page in the site tree and open it for editing.
The aggregate pages are found in the following locations in the site tree:
- Programs Aggregate -- This is the index page in the programs folder.
- News Aggregate -- This is the index page in the news folder.
- Events Aggregate -- This is the index page in the events folder.
In this example, the Events aggregate page is opened as a new metadata item was added for events.
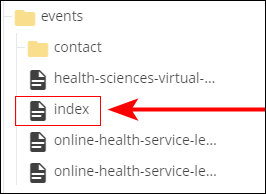
Step 2: Expand the Filters section and locate the group of filters corresponding to the metadata group to which the new item was added. In this example, the new item was added to the Location metadata group.
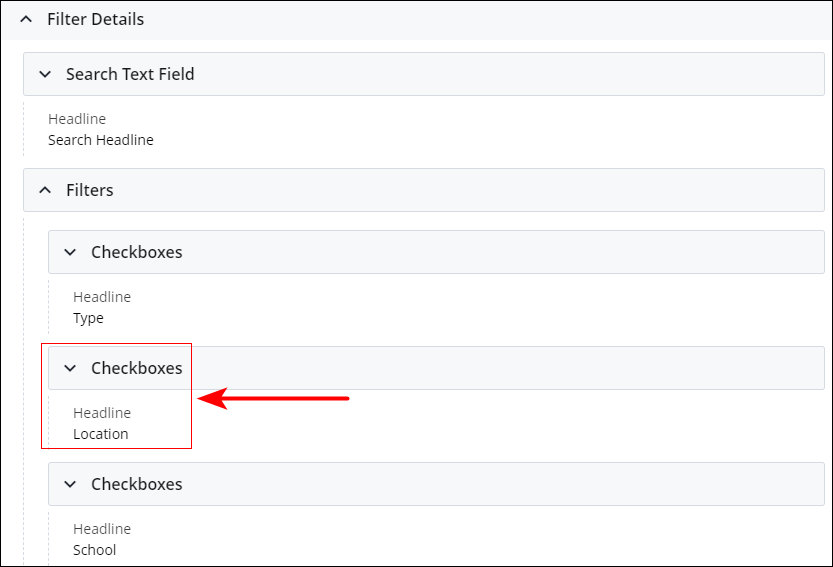
Step 3: Expand the group to reveal the filters.
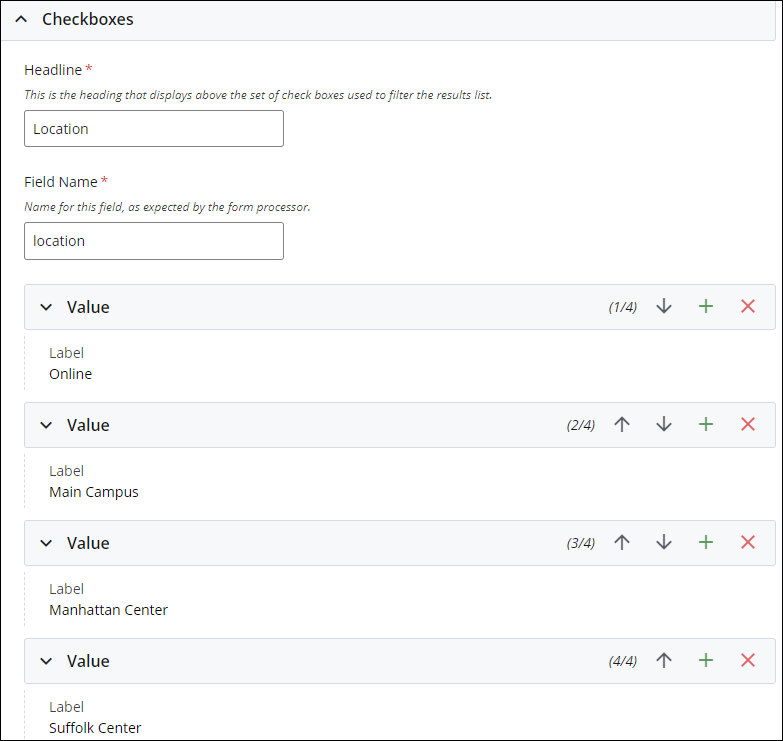
Step 4: Click the "+" icon on the existing filtering option under which you want to add the new filtering option.

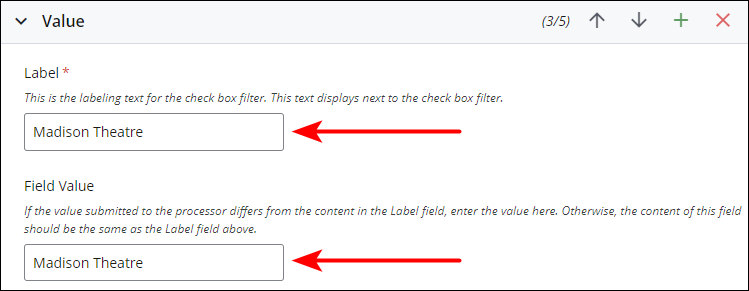
Step 5: A set of fields for the new filtering option are added. Enter the same content you used when creating the metadata item into both fields. In this example, the new metatdata item is Madison Theatre, so this is entered into both fields.
This links the filter to the metadata item so that when the filter is selected, pages that have the metadata item checked in their Aggregate Details fields will be returned.
Step 6: After the CMS saves the new filtering option (i.e. "Draft saved" displays at the top of the editing panel) click Preview Draft to preview the aggregate page. The new filtering option will be visible in the set of filters in the left column.
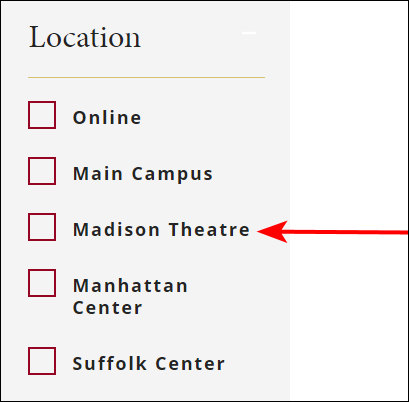
IMPORTANT: The aggregate results do not load in Page Preview mode, so checking the check box for the new filter will not perform any action in Page Preview mode. The filter will be actionable on the website.
Step 7: Publish the Aggregate page to the website. The new filter will be present on the page and will filter the results to return only pages assigned to the filter's corresponding metadata item.
